With the latest update for Windows 10 (version 1903), you can install a Linux distro as a Windows 10 Subsystem. This is very cool for us B4J developers as we can now very easily setup an environment for e.g. a jServer Web App without creating a VM. You can mimic a VPS, try out load balancing stuff with HAProxy, setting up an Apache or MySQL server etc...
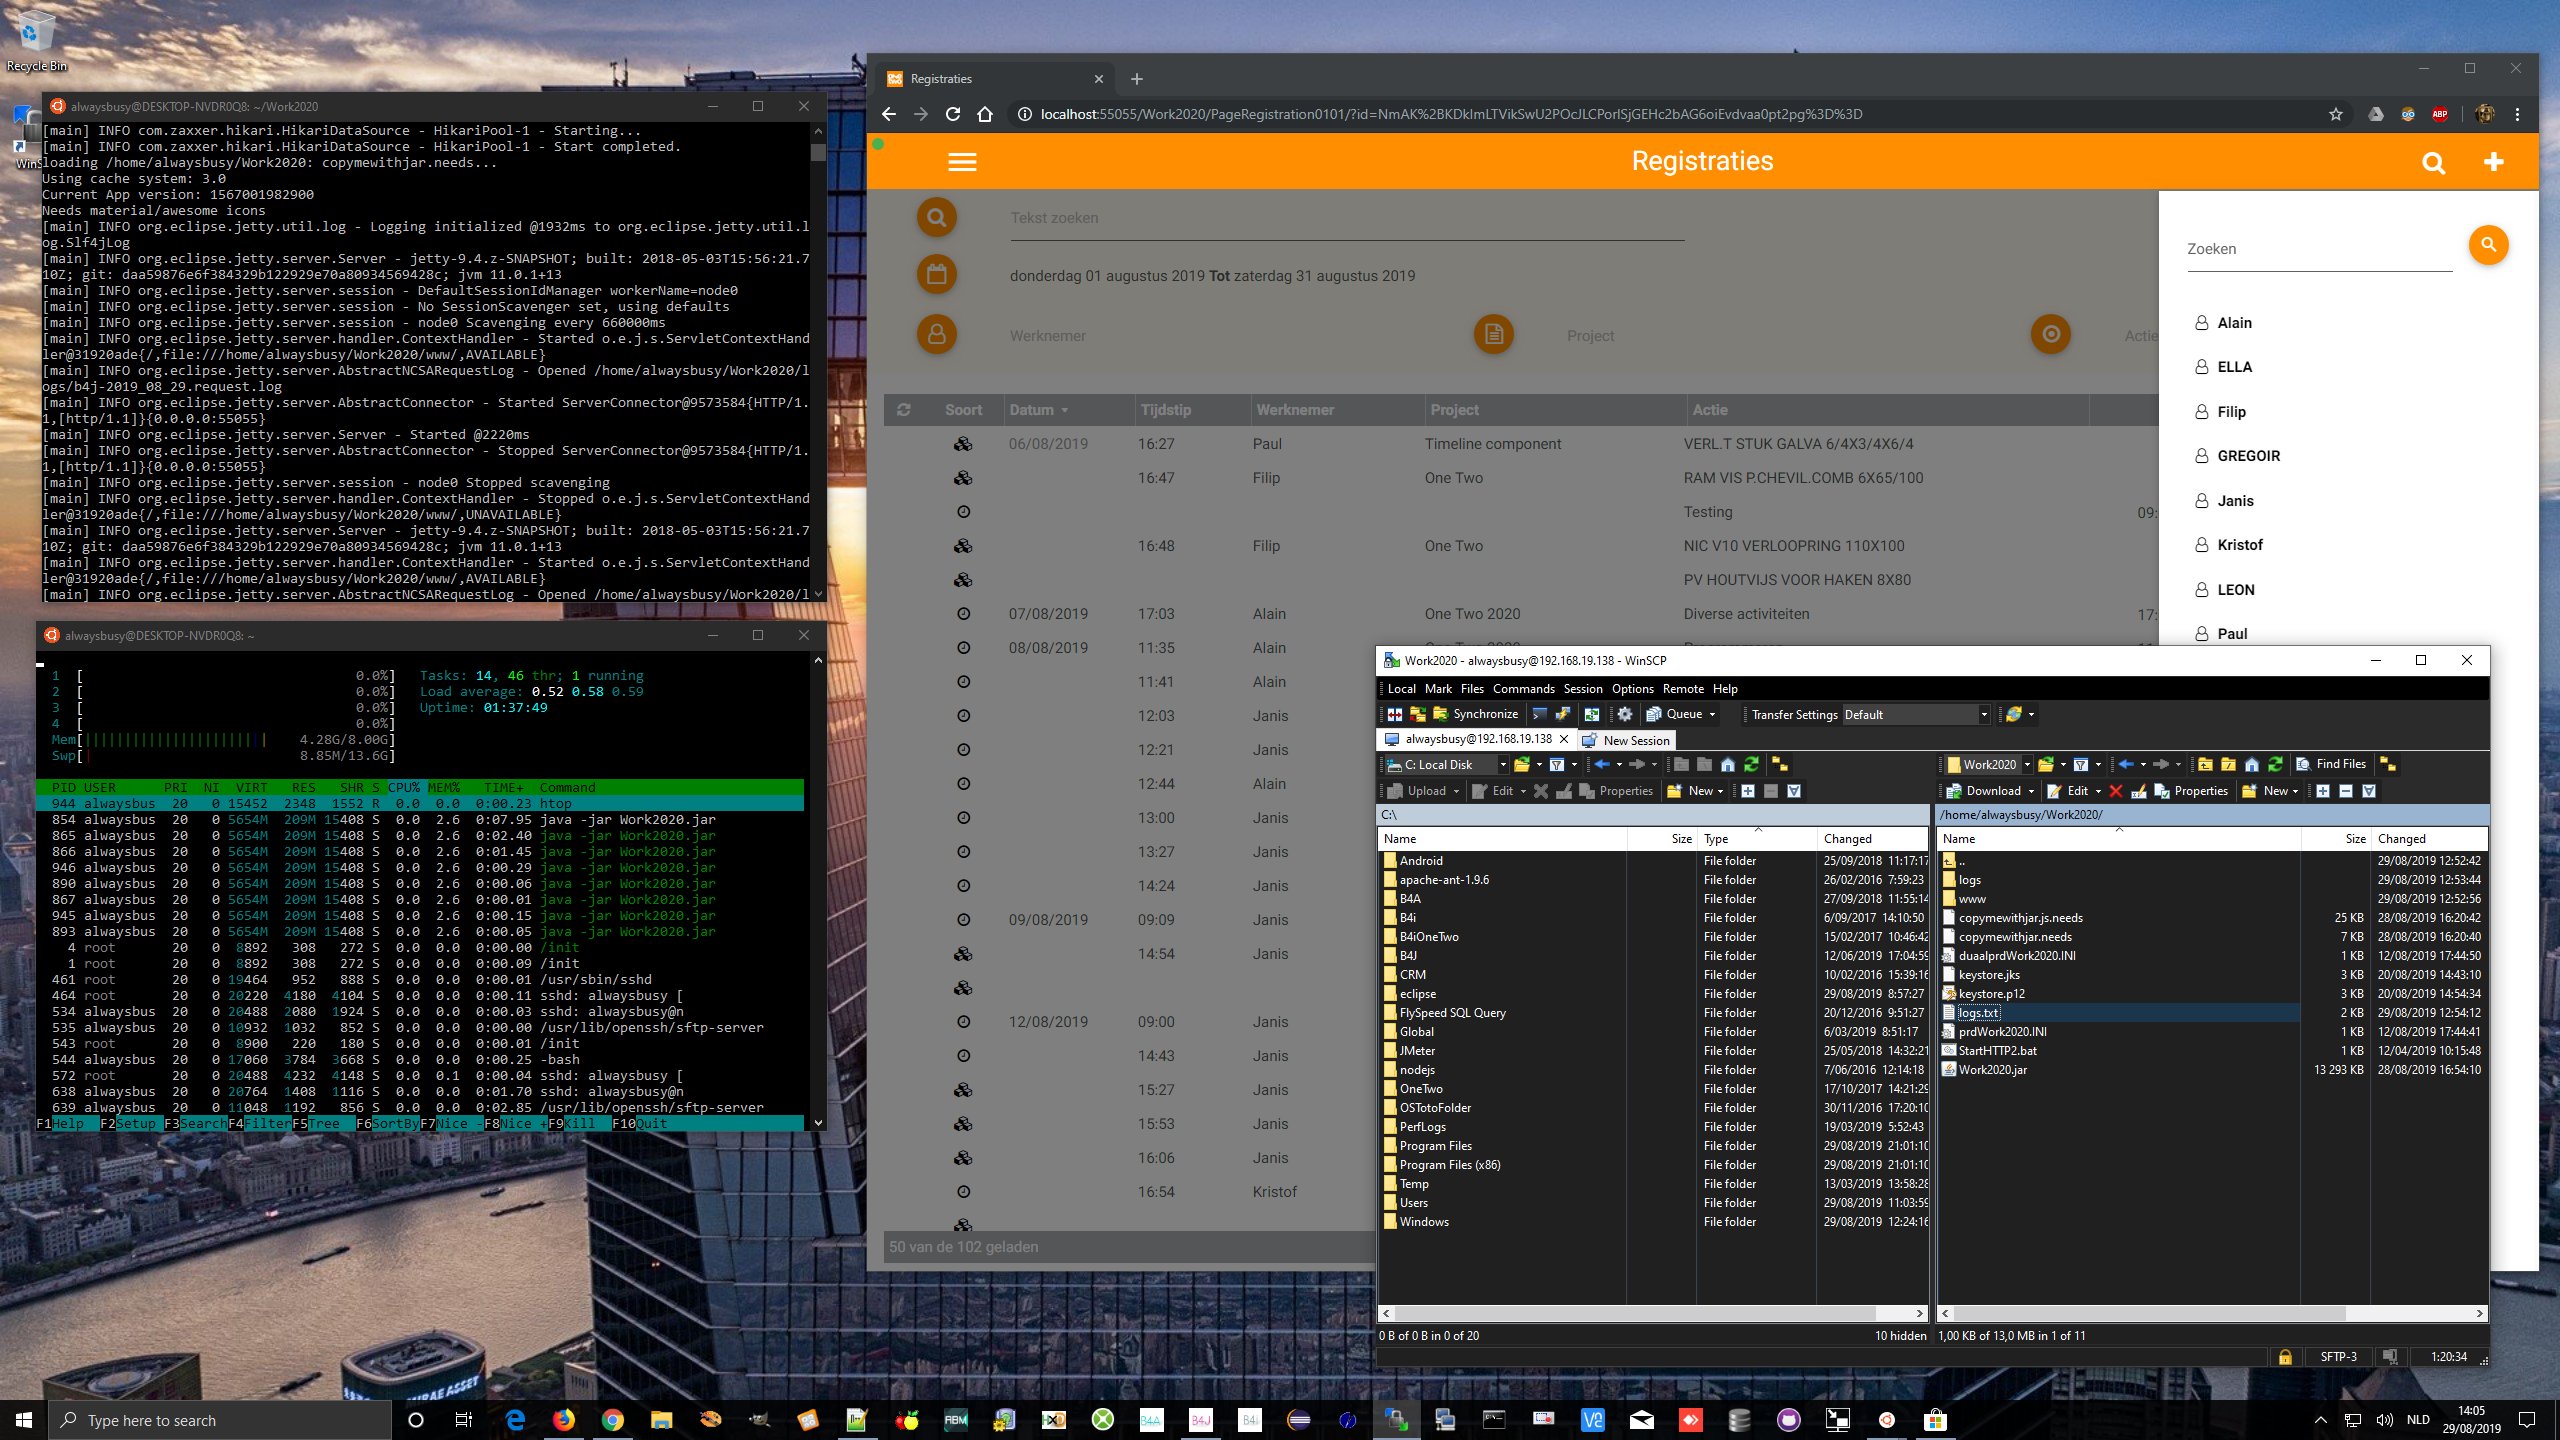
Here is for example an Ubuntu 18.04 LTS running an ABM jServer WebApp right from my Windows 10 desktop:

In this guide, I will show how to install the Ubuntu, enable SSH so we can access it with WinSCP to transfer files and install Java OpenJDK 11.
GUIDE:
1. Check if you have the latest version of Windows 10. You need to have release 1903 or more. If you don't, you will have to update first and then continue with this guide.
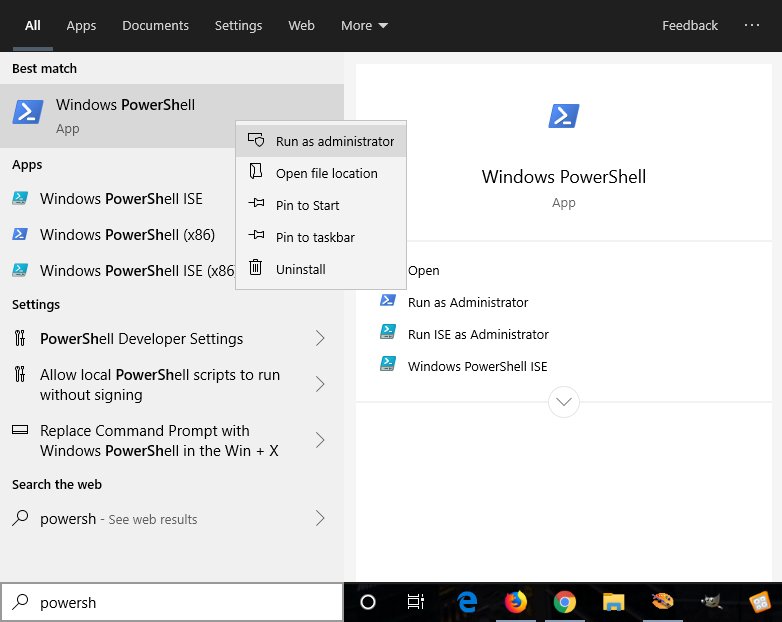
2. First, we have to allow Windows 10 to run a SubSystem. Open a Powershell in Administrator mode:

Run the following command:
You may have to reboot the computer to activate it.
3. Now you can install a linux distro from your choice from the Microsft Store. Here are some that are available:
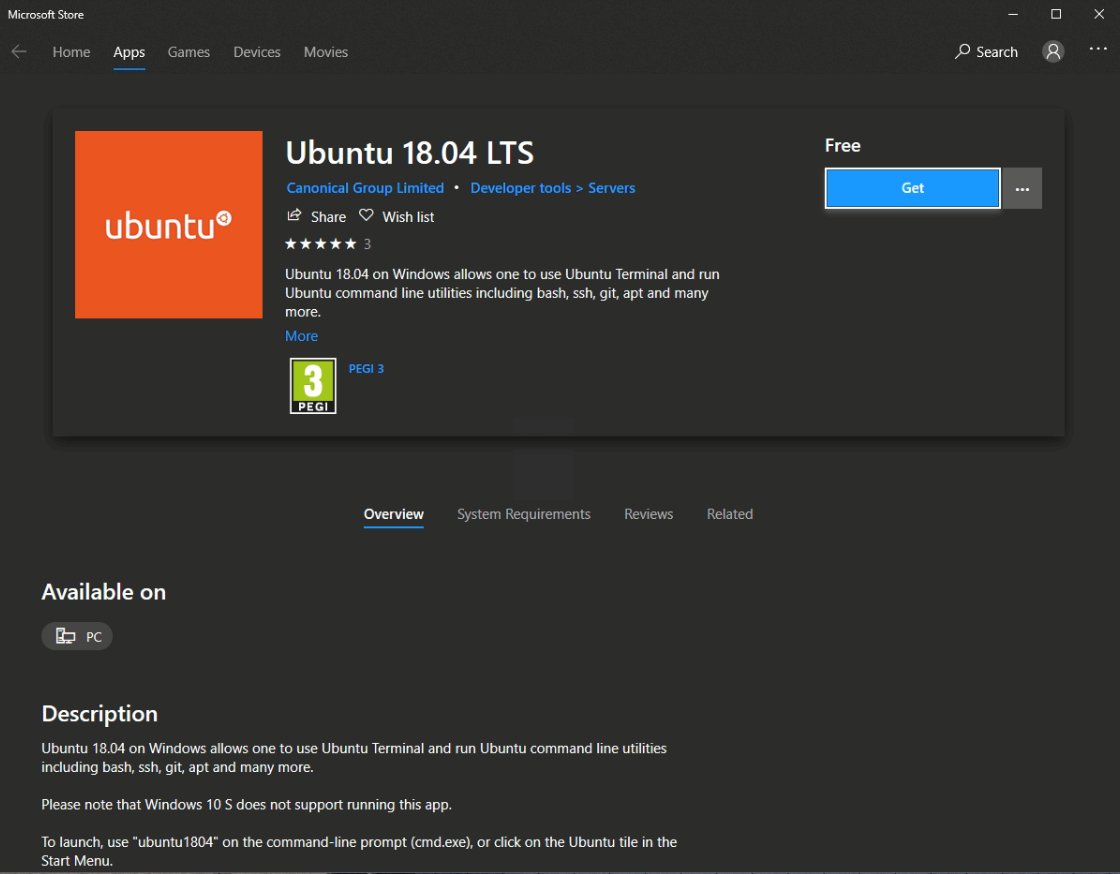
Open up the Microsoft Store and search for Ubuntu.

You will be greeted with an Ubuntu terminal. It will run the installation...
I was then asked to enter a UNIX user name and password.
That is it for the Ubuntu installation. You can now run all kind of linux commands like:
4. Setting up SSH for WinSCP
It is very useful to have an SSH connection, for example to transfer files between you 'Ubuntu server' and your local machine. I first started writing the tutorial for it myself, but this is a very good tutorial with screenshots to setup SSH so I suggest you follow this one:
https://www.illuminiastudios.com/dev-diaries/ssh-on-windows-subsystem-for-linux/
Once this is done, you can use e.g. WinSCP https://winscp.net/eng/download.php
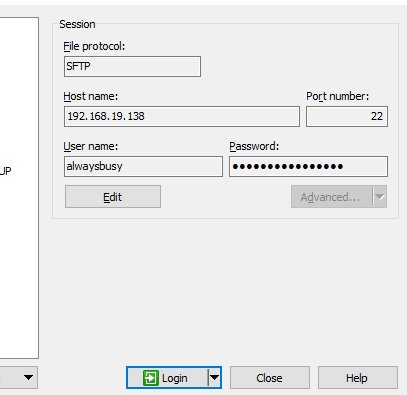
You can setup a connection (use 'ifconfig' in your Ubuntu to find your IP). This were my settings:

5. installing OpenJDK 11
Download the openjdk tar file:
Next, I had to create a folder in /usr/lib/
go to this folder (you may have to do a couple time cd .. to get to the root first. Then go into /etc/lib and make the folder with:
Then go back to where you downloaded the .tar.gz file and extract it:
Java is installed! You can now add it to your path so it can be accessed from everywhere:
Run:
And at the end add the following lines:
Press Ctrl+X and save. You may have to close the terminal and re-open it.
To check, run now:
You should see something like this:
Now you can run all your B4J server apps right from within your Windows 10 environment. And a lot more!
Alwaysbusy
Here is for example an Ubuntu 18.04 LTS running an ABM jServer WebApp right from my Windows 10 desktop:

In this guide, I will show how to install the Ubuntu, enable SSH so we can access it with WinSCP to transfer files and install Java OpenJDK 11.
GUIDE:
1. Check if you have the latest version of Windows 10. You need to have release 1903 or more. If you don't, you will have to update first and then continue with this guide.
2. First, we have to allow Windows 10 to run a SubSystem. Open a Powershell in Administrator mode:

Run the following command:
B4X:
Enable-WindowsOptionalFeature -Online -FeatureName Microsoft-Windows-Subsystem-LinuxYou may have to reboot the computer to activate it.
3. Now you can install a linux distro from your choice from the Microsft Store. Here are some that are available:
- Ubuntu 16.04 LTS
- Ubuntu 18.04 LTS
- OpenSUSE Leap 15
- OpenSUSE Leap 42
- SUSE Linux Enterprise Server 12
- SUSE Linux Enterprise Server 15
- Kali Linux
- Debian GNU/Linux
- Fedora Remix for WSL
- Pengwin
- Pengwin Enterprise
- Alpine WSL
Open up the Microsoft Store and search for Ubuntu.

- Click on the latest LTS version which is Ubuntu 18.04 LTS as of today.
- Click on Get and wait for installation to finish.
You will be greeted with an Ubuntu terminal.
I was then asked to enter a UNIX user name and password.
That is it for the Ubuntu installation. You can now run all kind of linux commands like:
B4X:
sudo apt update
sudo apt upgrade
htop (to monitor memory usage)
nano (editor)
ls /mnt/c (lists the files on your windows C folder, can be used e.g. to copy files)
...
4. Setting up SSH for WinSCP
It is very useful to have an SSH connection, for example to transfer files between you 'Ubuntu server' and your local machine. I first started writing the tutorial for it myself, but this is a very good tutorial with screenshots to setup SSH so I suggest you follow this one:
https://www.illuminiastudios.com/dev-diaries/ssh-on-windows-subsystem-for-linux/
Once this is done, you can use e.g. WinSCP https://winscp.net/eng/download.php
You can setup a connection (use 'ifconfig' in your Ubuntu to find your IP). This were my settings:

5. installing OpenJDK 11
Download the openjdk tar file:
B4X:
wget https://download.java.net/java/GA/jdk11/13/GPL/openjdk-11.0.1_linux-x64_bin.tar.gzNext, I had to create a folder in /usr/lib/
go to this folder (you may have to do a couple time cd .. to get to the root first. Then go into /etc/lib and make the folder with:
B4X:
mkdir jvmThen go back to where you downloaded the .tar.gz file and extract it:
B4X:
sudo tar xvf openjdk-11.0.1_linux-x64_bin.tar.gz --directory /usr/lib/jvm/Java is installed! You can now add it to your path so it can be accessed from everywhere:
Run:
B4X:
sudo nano /etc/profileAnd at the end add the following lines:
B4X:
JAVA_HOME=/usr/lib/jvm/jdk-11.0.1
PATH=$PATH:$HOME/bin:$JAVA_HOME/bin
export JAVA_HOME
export JRE_HOME
export PATH
Press Ctrl+X and save. You may have to close the terminal and re-open it.
To check, run now:
B4X:
java -versionYou should see something like this:
B4X:
Openjdk version "11.0.1" 2018-10-16
OpenJDK Runtime Environment 18.9 (build 11.0.1+13)
OpenJDK 64-Bit Server VM 18.9 (build 11.0.1+13, mixed mode)
Now you can run all your B4J server apps right from within your Windows 10 environment. And a lot more!
Alwaysbusy
Last edited:
