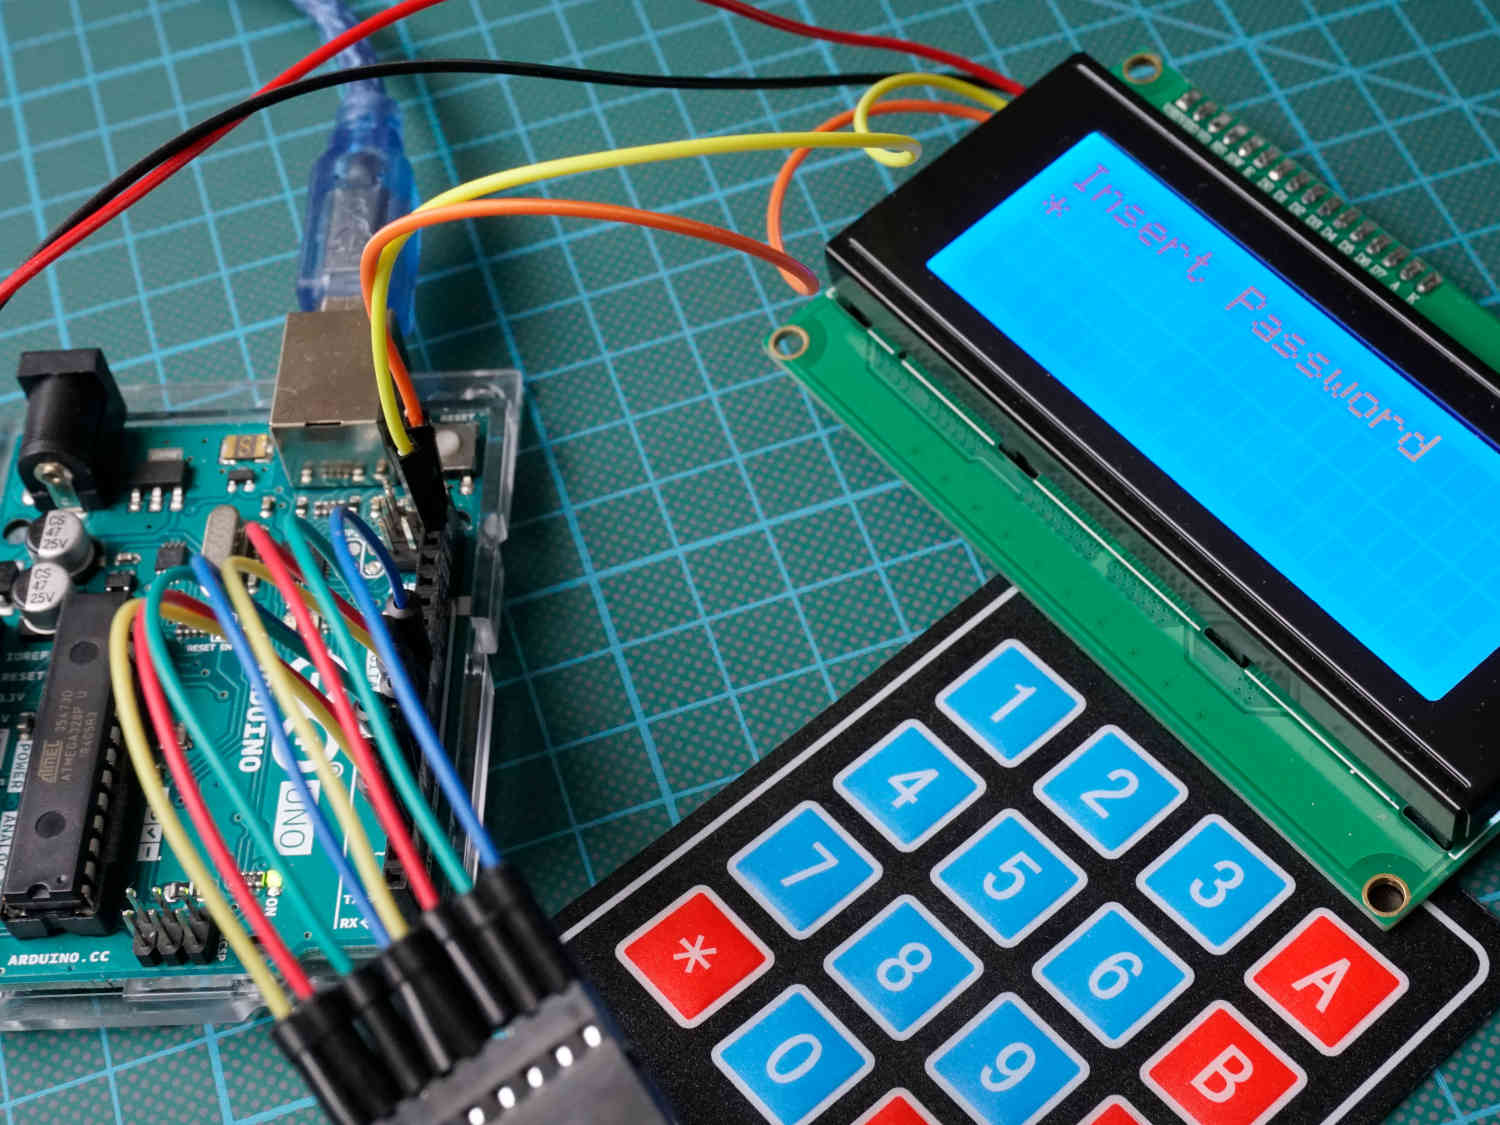
B4R Library Keypad

SS-2016-10-30_11.52.39.jpg


Simple library that monitors keypad key presses.

It is based on the Arduino Keypad library: http://playground.arduino.cc/Code/Keypad

You need to initialize the Keypad with the characters, row pins and column pins. Note that if you are not sure about the order then just connect the pins and try it. Change the pins order in the Initialize method based on the keys that are raised.

Example that waits for a password to be entered:
B4X:
Sub Process_Globals
   Public Serial1 As Serial
   Private pad As Keypad
   Private password As String = "123456" 'the password is *123456
   Private passwordBuffer(6) As Byte
   Private passwordIndex As Int
   Private bc As ByteConverter
End Sub

Private Sub AppStart
   Serial1.Initialize(115200)
   Log("AppStart")
   pad.Initialize("123A456B789C*0#D", Array As Byte(9, 8, 7, 6),  Array As Byte(5, 4, 3, 2), _
     "pad_KeyPressed")
End Sub

Sub Pad_KeyPressed (Key As String)
   If Key = "*" Then
     passwordIndex = 0
     'this is not really required, but it makes the logs nicer.
     bc.ArrayCopy("000000", passwordBuffer)
   Else if passwordIndex < passwordBuffer.Length Then
     'put the key in the buffer.
     passwordBuffer(passwordIndex) = Asc(Key)
     passwordIndex = passwordIndex + 1
     If passwordIndex = passwordBuffer.Length Then
       If passwordBuffer = password Then
         Log("Well done!!!")
       End If
     End If
   End If
   Log(passwordBuffer)
End Sub
 

Attachments

  • rKeypad.zip
    9.3 KB · Views: 944

Cableguy

Expert
Licensed User
Longtime User
and, yes, you can simulate keypad with 2/3 dupont wires, connecting a "row" with a "col" with one of them to simulate "key pressed"
I tried that, didn't work. Most multiplexed matrixes like this one use resistors on one side to (ex: on columns side) to differentiate the values on the rows...
So let say that through row 0 (in series a 1k Resistor) at the end of the resistor there's 2.9V (merely hypothetical, for explanation purposes) and that row 1 has 3.3V (No resistor), when a key is pressed in Row 0, one of the column pins will read 2.9V, and this way know which button was pressed, same thing for Row 1, wich will then read 3.3v in the columns side...
But I don't have resistors with me!
 

Daestrum

Expert
Licensed User
Longtime User
have you tried (as the library (arduino) wants rows,cols)
B4X:
pad.Initialize("123456789*0#", Array As Byte(5, 4, 0, 2),  Array As Byte(14,12,13), "pad_KeyPressed")
 

Cableguy

Expert
Licensed User
Longtime User
have you tried (as the library (arduino) wants rows,cols)
B4X:
pad.Initialize("123456789*0#", Array As Byte(5, 4, 0, 2),  Array As Byte(14,12,13), "pad_KeyPressed")
Yes, I tried that...
I don't know exactly how the keypad lib is "reading" the keys, but I suspect it has 2 fast timers, one for the columns and another for the rows, that sweeps the keypad in "search" of a pressed key...
I just can't figure why this doesn't work...
I guess a code module is possible to create in order to replicate this... I just tested a very crude 2x2 key pad.... no sweeping, just to test.
 

pappicio

Active Member
Licensed User
Longtime User
have you tried (as the library (arduino) wants rows,cols)
B4X:
pad.Initialize("123456789*0#", Array As Byte(5, 4, 0, 2),  Array As Byte(14,12,13), "pad_KeyPressed")
if you write that line char by char, the suggestion told: rows and then cols, so I've tried in that order, and then inverted all of them, same result, doesn't work.
 
Last edited:

pappicio

Active Member
Licensed User
Longtime User
Yes, I tried that...
I don't know exactly how the keypad lib is "reading" the keys, but I suspect it has 2 fast timers, one for the columns and another for the rows, that sweeps the keypad in "search" of a pressed key...
I just can't figure why this doesn't work...
I guess a code module is possible to create in order to replicate this... I just tested a very crude 2x2 key pad.... no sweeping, just to test.
this is electrical scheme of matrix keypad as it worls, and examples for arduino esp8266/32 with ino file, and all seems to work (same library wrapped in b4r)

but in my opinion, this library wan't work, I don't know what was changed in time, maybe worked some years agoo, but now, I can't be able to make it working.


pappicio

Active Member
Licensed User
Longtime User
or maybe will be better transform a matrix keypad to onewire keypad with analog output


Cableguy

Expert
Licensed User
Longtime User
or maybe will be better transform a matrix keypad to onewire keypad with analog output

You can do with 4 Wires....
I will try to create a code module for this, but I can't give you any ETA ....
 

Cableguy

Expert
Licensed User
Longtime User
4 wires? how? with an i2c module?
Using a voltage divider created with resistors! Basic electronics.

But first, I will try to do without, but using 8 wires.
 

Cableguy

Expert
Licensed User
Longtime User
So, This code works, but you will have to finish it.
KeyPad test:
Sub Process_Globals
    Public Serial1 As Serial
    
    'These will do our sweep
    Public RowTimer1 As Timer
    Public RowTimer2 As Timer
    Public RowTimer3 As Timer
    Public RowTimer4 As Timer
    
    'But we need to keep track of what Row is active
    Public ActiveRow As Int
    
    'Row Pin definitions
    Public RowPin1 As Pin
    Public RowPin2 As Pin
    Public RowPin3 As Pin
    Public RowPin4 As Pin
    
    'Column Pin definitions
    Public ColPin1 As Pin
    Public ColPin2 As Pin
    Public ColPin3 As Pin
    Public ColPin4 As Pin
    
    Public Duration As Int
    
End Sub

Private Sub AppStart
    Serial1.Initialize(115200)
    Log("AppStart")
    
    'Sweep Duration
    Duration = 5
    
    'Row Pins Initialization and Mode
    RowPin1.Initialize(0, RowPin1.MODE_OUTPUT)
    RowPin2.Initialize(2, RowPin2.MODE_OUTPUT)
    RowPin3.Initialize(4, RowPin3.MODE_OUTPUT)
    RowPin4.Initialize(5, RowPin4.MODE_OUTPUT)
    
    'Col Pins Initialization and Mode
    ColPin1.Initialize(12, ColPin1.MODE_INPUT)
    ColPin2.Initialize(13, ColPin2.MODE_INPUT)
    ColPin3.Initialize(14, ColPin3.MODE_INPUT)
    ColPin4.Initialize(15, ColPin4.MODE_INPUT)
    
    'Columns are the ones we need to read
    ColPin1.AddListener("ColPin1_StateChanged")
    ColPin2.AddListener("ColPin2_StateChanged")
    ColPin3.AddListener("ColPin3_StateChanged")
    ColPin4.AddListener("ColPin4_StateChanged")
    
    RowTimer1.Initialize("RowTimer1_Tick", Duration)
    RowTimer2.Initialize("RowTimer2_Tick", Duration)
    RowTimer3.Initialize("RowTimer3_Tick", Duration)
    RowTimer4.Initialize("RowTimer4_Tick", Duration)
    
    'lets start the sweep
    RowTimer1.Enabled = True
End Sub

Private Sub RowTimer1_Tick
    ActiveRow = 1
    RowPin1.DigitalWrite(True)
    RowPin2.DigitalWrite(False)
    RowPin3.DigitalWrite(False)
    RowPin4.DigitalWrite(False)
    
    RowTimer1.Enabled = False
    Delay(0)
    RowTimer2.Enabled = True
End Sub

Private Sub RowTimer2_Tick
    ActiveRow = 2
    RowPin1.DigitalWrite(False)
    RowPin2.DigitalWrite(True)
    RowPin3.DigitalWrite(False)
    RowPin4.DigitalWrite(False)
    
    RowTimer2.Enabled = False
    Delay(0)
    RowTimer3.Enabled = True
End Sub
    
Private Sub RowTimer3_Tick
    ActiveRow = 3
    RowPin1.DigitalWrite(False)
    RowPin2.DigitalWrite(False)
    RowPin3.DigitalWrite(True)
    RowPin4.DigitalWrite(False)
    
    RowTimer3.Enabled = False
    Delay(0)
    RowTimer4.Enabled = True
End Sub
    
Private Sub RowTimer4_Tick
    ActiveRow = 4
    RowPin1.DigitalWrite(False)
    RowPin2.DigitalWrite(False)
    RowPin3.DigitalWrite(False)
    RowPin4.DigitalWrite(True)
    
    RowTimer4.Enabled = False
    Delay(0)
    RowTimer1.Enabled = True
End Sub
    
Private Sub ColPin1_StateChanged (State As Boolean)
    Log("Row", ActiveRow)
    Log("Col1")
    Log(State)
End Sub
    
Private Sub ColPin2_StateChanged (State As Boolean)
    Log("Row", ActiveRow)
    Log("Col2")
    Log(State)
End Sub

Private Sub ColPin3_StateChanged (State As Boolean)
    Log("Row", ActiveRow)
    Log("Col3")
    Log(State)
End Sub
    
Private Sub ColPin4_StateChanged (State As Boolean)
    Log("Row", ActiveRow)
    Log("Col4")
    Log(State)
End Sub

What is left to do is, either inside each StateChanged determine wich of the 4 keys of the Column was pressed, or pass the ActiveRow, column and State (1 is pressed) to another sub and do the rest.
 

pappicio

Active Member
Licensed User
Longtime User
Using a voltage divider created with resistors! Basic electronics.

But first, I will try to do without, but using 8 wires.
With d1 mini you have only 1 analog PIN, so or One wire, or nothing. Btw, I've tried also timer only One with variabile "rows" that loops from 0 to 3 (to check wich row was High) disabling It for all the time a Key Is pressed and re-enabling It when a Key Is released, (so, rows var change value and enable One row PIN, disabling the other 3 ) with no good results, I have to study tour code meshing It maybe, with mine ...
 

pappicio

Active Member
Licensed User
Longtime User
B4X:
#Region Project Attributes
    #AutoFlushLogs: True
    #CheckArrayBounds: True
    #StackBufferSize: 600
#End Region
'Ctrl+Click to open the C code folder: ide://run?File=%WINDIR%\System32\explorer.exe&Args=%PROJECT%\Objects\Src

Sub Process_Globals
    Private wifi As ESP8266WiFi
    Public Serial1 As Serial
    Public mykey As Byte
    Private password As String = "12345678" 'the password is 12345678, then press "#" to confirm password inserted!
    Private passwordBuffer(password.Length) As Byte
    Private passwordIndex As Int
    dim bc as ByteConverter
    Dim timer1 As Timer
End Sub

 
Private Sub AppStart
    Serial1.Initialize(115200)
    Log("AppStart")
 
If wifi.Connect2("DDIS1", "password1") Then
        Log("Connected to network ")
    Else
        If wifi.Connect2("SSID2", "password2") Then
            Log("Connected to network ")
        Else
             If wifi.Connect2("SSID3", "password3") Then
                 Log("Connected to network ")
            Else
               Log("Failed to connect to network")
            End If
        End If
    End If

     timer1.Initialize("timer1_tick", 5000) 'you have 5 seconds for each number digit, after password will be resetted
 
    'reset password....
    clearpassword
    AddLooper("looperx")
End Sub
 
#if c
#include <Keypad.h>
const byte ROWS = 4; //four rows
const byte COLS = 3; //four columns

char keys[ROWS][COLS] = {
  {'1','2','3'},
  {'4','5','6'},
  {'7','8','9'},
  {'*','0','#'}
};

// For Arduino Microcontroller
//byte rowPins[ROWS] = {9, 8, 7, 6};
//byte colPins[COLS] = {5, 4, 3, 2};

// For ESP8266 Microcontroller
byte rowPins[ROWS] = {D1, D2, D3, D4};
byte colPins[COLS] = {D5, D6, D7};

// For ESP32 Microcontroller
//byte rowPins[ROWS] = {23, 22, 3, 21};
//byte colPins[COLS] = {19, 18, 5, 17};

Keypad keypad = Keypad(makeKeymap(keys), rowPins, colPins, ROWS, COLS);
 

void loop2(B4R::Object* o) {
  // Serial.println('xxx');
  char key = keypad.getKey();
  //b4r_main::_mykey =  (char) 0;
  if (key){
     b4r_main::_mykey = key;
    //Serial.println(key);
  }
}
#End If
 
 Sub looperx
 
     mykey=0
    RunNative( "loop2" , Null )
    If mykey<>0 Then
        timer1.Enabled=False
        timer1.Enabled=True
        Pad_KeyPressed (mykey)
        mykey=0
    End If
End Sub

Sub timer1_tick
    clearpassword
    Log("password cleared!!!")
    timer1.Enabled=False
End Sub

Sub clearpassword
    timer1.Enabled=False
    passwordIndex = 0
    For x=0 To password.Length-1
        bc.ArrayCopy2("-",0,passwordBuffer,x,1)
    Next
End Sub

Sub Pad_KeyPressed (Key As Byte)
    Log("key: ", Key) 'for debug only
    If (Key) = 42 Then '42 is * char
        Log("asc: " , Asc(Key))
        Log("cleared")
        clearpassword
        Return
    End If
 
 
    If passwordIndex >= passwordBuffer.Length Then
        passwordIndex=0
    End If
 
    If (passwordIndex < passwordBuffer.Length) And (Key<>35) Then
        Log("again...")
        'put the key in the buffer.
        passwordBuffer(passwordIndex) =  (Key)
        Log("asc: " , Asc(Key))
        passwordIndex = passwordIndex + 1
        Log(passwordBuffer)
    End If
 
    'if you press # you confirm password inserted
    If Key=35  Then
          'if right password
          If passwordBuffer = password Then
              Log("Well done!!!")
            Log("Well done!!!")
            Log("Well done!!!")
            Log("Well done!!!")
            Log("Well done!!!")
 
          'otherwise...ERROR!!!!!
          Else
            Log ("CODE ERROR!!!")
            Log ("CODE ERROR!!!")
            Log ("CODE ERROR!!!")
          End If
          Log("cleared2")
    
          clearpassword
    End If
 
 
End Sub
I've included all native .cpp/.h files into project, to compile, compiles, but cannot try at moment cos have to go to work, maybe today afternoon, if someone else can test in morning, or maybe doesn't work, like b4r wrapper.....
P.S.: Edited code, now all works as expected and a timer after 5 seconds after last key pressed, if no key will be press, clear all keys pressed before (you can change timeout time more or less than 5 seconds....)
TESTED ON:
Wemos D1 mini, all works!
Nodemcu, same code, same pins (D1/D7), all works!

I'll try it also on ESP32.....

P.P:S.: Remember to add in arduino ide the "keypad" library (actual version 3.1.1)
 
Last edited:

pappicio

Active Member
Licensed User
Longtime User
okok, with inline c code, seems to work property now!!!!
so, something wrong into b4r wrapper of that library.....
well!!!

the code of my previous post was now edited as working for me on wemos d1 mini!!!
 

Attachments

  • works.png
    works.png
    88.5 KB · Views: 107
Last edited:

Cableguy

Expert
Licensed User
Longtime User
May I suggest you to create a "snippets" thread and share your working code that way, not forgetting to give context so that other devs can understand why they should use your solution.
It will help greatly other devs having issues with the original lib.
Also, add a link to your snippets thread, if you so decide to create it, in this thread too.
 

pappicio

Active Member
Licensed User
Longtime User
May I suggest you to create a "snippets" thread and share your working code that way, not forgetting to give context so that other devs can understand why they should use your solution.
It will help greatly other devs having issues with the original lib.
Also, add a link to your snippets thread, if you so decide to create it, in this thread too.
never created one of it, but I'd like to use library wrapper, maybe someone else can understand why, now, inline c works, while the b4r library not more (maybe in the past it did, shurely it worked, something, somewhere is changed, c code, as on its github, seems to be from years the same...)
 

Beja

Expert
Licensed User
Longtime User
Hi Erel
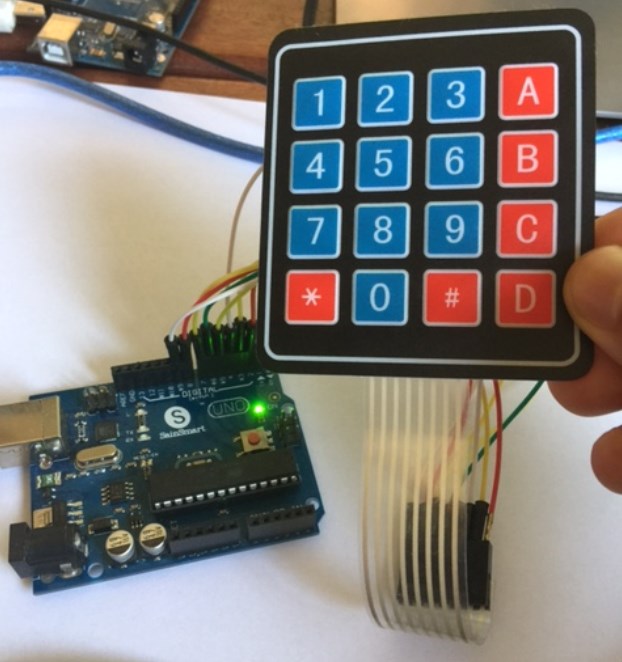
This is a great libs. I saw it today just on time.. I bought a keypad yesterday fro amazon , but was 3x4 matrix. The picture is exact.
Can this lib be used for this keypad too?

Screenshot_20240812_225915_Chrome.jpg
 

Cableguy

Expert
Licensed User
Longtime User
@Beja ,
Even if the arduino library dont work, you can mok up one using pure b4r...
 

Beja

Expert
Licensed User
Longtime User
trying the keypad with Arduino Uno and the TM1637 example, run out of pins!. will use Mega instead.
 
Top