Hi all,
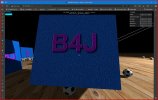
here a simple shooter game using B4J WebGL libary and cannon.js physic engine.
Note that really I use cannon-es that is a port of cannon.js to use inside Javascript ES6 modules.
Note that threejs have inside more than one popular physics engines, see cannon.js, ammo.js, rapier.js.
All will work similar way but I'm not expert to know differences and what is best for you. You will have to search on the web.
This demo code will show how you can develop a fully functional shot game or a realistic simulation scene.
It can even be used as start point to develop any ball game like football, tennis, squash, golf, minigolf, billiard, booling, flipper, arcade games and so on.
The code will show you how to create a 3D scene, create objects and attach to these the physic engine.
When you have setup the physic engine by initializing it and apply the gravity (on one or up 3 axis)
and applied physics, mass etc... to any object, they all are affected the way you will need.
In the demo the small GUI will permits you to change some things in the scene, like the gravity, the balls size, the ball speed, the texture bump of some objects.
By default the balls have fixed speed, if the Adaptive Ball Speed checkbox is checked, then the ball speed will be transformed to dynamic.
With Adaptive Ball Speed when you click on the mouse, a timer will start, when a button is released, a timer stop, the ball speed will be proportional to the time you hold down the button.
To have a low speed press and release fast, to have more speed, press and hold 1, 2, 3, 4 and more seconds, the more you hold the more the speed will increase.
To get this project working you will have to follow the WebGL library setup and have the latest library 1.24 version.
The project contain some additional resources, 3 classes for cannon-es, these are the physics engines used here, so they will be placed in the right position where you can reuse on all your projects. In the jsm/physics/ folder.
After this, there are some textures. All resources files are placed in a zip files and extracted and copied with just one library command to the right folders passed in a list.
This simplify a lot importing resources, they can be inside a zip files or not, zipped to a single folder or to multiple folders.
The resource zip file is not big, 1.7 MB , but because I cannot post here, download it from my Drive and put it on Assets of the project.
Here the link: Resources.zip
Pay particular attention on how I extract by code the resources, after this only you need to put a zip file containing all files in assets folder. All the files in the zip must be in the root folder, but will be extracted to the right multiple folders. This will avoid you have to place files manually inside different folders and, so even avoid wrong placement errors expecially when your project need a lots of files.
Pay particular attention on how I add parameters of my interest to the GUI, they can be changed with sliders in realtime while the scene is rendered.
I hope you like it....
In the next chapters I will start show you how to get simple Shooter or FPS game with a base template and then in the next one how to get simple Flying game, so stay tuned.
In a mean while if you interested, may you want to study this code to better know how it works.
Attachments


Last edited: